Saturday, November 27, 2010

How to reupholster, Part 3b - the finale!!!

It is time to finish up our journey in reupholstering.  I believe we left off with me beating my head in the wall a few times.  Never fear, the headache is gone.  Okay, yesterday I left off without any pictures.  So, here we go.  I began attaching the fabric starting with the last piece I had removed.  Let me just say that I tried and tried to use my electric stapler but no luck.  I had to go old school and use my trusty tack hammer and tacks.  Here she is after attaching the back piece of the front.


You may have noticed that I put new batting down on the front of the chair.  Once I saw the previous batting in the light of day, it looked a little dirty.  You know from yesterday's post that it was a bear to get the bottom front stapled without wrinkles.  After I got that under control, I stapled down the seat cushion then the back of the chair.  Here is all of that hard work:


Now for the lipstick!  I tried to go the easy route and buy some sort of braiding but had no luck matching colors.  I got busy making double cording to cover those unsightly tacks.  My supplies were cording, 2" strips of the fabric and a double cording foot.


I was pretty intimidated about making the double cording but there is a great tutorial at Design Intervention here.  This is a shot of my success!


Now, I just need to heat up the glue gun and get this chair done!


Just a reminder of the before:


Okay, drum roll please!!!!!


I can't tell you how happy I am to complete one chair.  I'm linking up to the following blogs to show this baby off:


Funky Junk's Saturday Nite Special
UndertheTableandDreaming


Furniture Feature FridaysJoin  us Saturdays at tatertotsandjello.com for the  weekend      wrap    up           party!

Friday, November 26, 2010

How to reupholster, Part 3a -the saga continues....

I really did mean to be finished with this chair but boy did it throw me for some loops.  One would have thought that attaching only 3 pieces of fabric would be easy.  Ha!  Ha!  The beautiful curves that attracted me to this chair has been my archenemy!  I have felt like Charlie Brown when Lucy keeps taking away the football every time he tries to kick it!

My biggest road block has been trying to fix the lower front back where the seat cushion meets the back.


I actually stapled and restapled, with bottom of the front back bottom about 3 different times.  Because of the curve, I kept getting wrinkles in the fabric.  I continued to cut the fabric like your suppose to around corners to give a better fit.  I even had to try to stuff in more batting.  Well, I beat my head into the wall so much I have a headache now. 

Tomorrow I promise to post a more thorough explanation on reupholstering.  Right now, I am to pooped from my early, early morning Black Friday shopping and beating my head against the wall over this chair.  Hope you enjoyed your Thanksgiving. 

Wednesday, November 24, 2010

How to reupholster a chair, Part 2

Are you ready to continue this journey with me?  Okay, now that the girl is stripped to her undergarments, it's time to give her a thorough examine.  Because the batting looks good and I'm trying to be as lazy as possible, I gingerly checked with stuffing which looked fine.  Usually, you would want to check the springs but I did mention that I'm trying to be lazy, didn't I?  In this case, I feel pretty confident about them because the chair sits well.  As I continue the examination, I noticed a hairline fracture in the frame.  It runs with the grain so I missed it when buying the chair.  If only I caught it early maybe I could have shaved a little money off the price.  Oh well.


Here is where my "know it all" hubby comes in.  At which time, he advices on how "he" will proceed to repair the damage.  What?  Someone has to take the pictures!  Okay, maybe it is a little more than a hairline fracture.   He decided on using a screw as well as wood glue.  Sorry, no pictures of the drilling into the frame for the screw.  He made a minor oops.  We both agreed I should walk away.  We both survived.  On to the wood glue!


As you can see, it is pretty much glue, clamp, and wait.  I'm hoping to finish up by Friday, but we'll have to see what kind of deals might make me want to jump out of bed to shop at 4 in the morning.  So, as we wait for the glue to dry, have a Happy Thanksgiving!

Tuesday, November 23, 2010

How to reupholster a chair, Part 1

Is everyone ready to start our upholstery journey?  Here we go!!!! 

If this is your first time reupholstering a piece, I suggest going to the library and having a how to book around.  You may even find a how to video as well.  First, let's talk about the tools you may need to begin the stripping process.  If you eat as much as I do on Thanksgiving, these tools may just come in handy to pry off those pants that looked really cute at the beginning of the day.  Anyways, I used a stapler/tack remover, mallet, and long needle nose pliers.  (Just a note.  It is nice to have pliers with a comfortable grip.  It may help prevent blisters.)


 Now, it is time to strip!  You want to start with the back of the chair.  Try to remove the cording or braiding.  Then, get started removing that fabric.  Little did I know that whoever upholstered this chair previously used industrial strength, you're never gonna get me off glue for the braiding.  It actually melted the parts of the fabric onto the wood frame at times making it extremely difficult to remove without damaging the frame.  Thus, my previous comment regarding comfortable pliers.  I made a run to Home Depot just to pick up a more comfortable pair for the second chair.   


After you peel away the back, next is the outside arms.  Fortunately, this chair doesn't have that.  Moving on, you would then take off the inside arms.  Thank goodness, I didn't have to do that either.  Next comes for the front back of the chair.  Does that even make sense?  Last, but not least, the seat cushion.  On a side note, you never know how someone put the chair together.  Be sure to take pictures.  


So, her is one of the girls exposed to her undergarments.  Tomorrow we will cover checking for repairs to frame and assessing the possible need to replace any stuffing, foam, and all that jazz.  Right now, I believe I will nurse my blister by laying back on my couch with a nice cold soda!  Until tomorrow!!!!

Monday, November 22, 2010

This is a fabric emergency

As I said, I have been crippled by fabric indecision!  I need your help.  I am recovering these chairs:


I originally bought this cream and brown zebra print but now I'm having second thoughts.  I have narrowed it down to three fabric choices.  Just so you know a little bit about my decorating dreams, I love french designs with monochromatic tones.  Not that I have achieved that look, but give me about 10 more years and I might make it there.

Anyways, here are my three fabric options:

#1- brown and cream zebra print


#2 - a cream maltese look


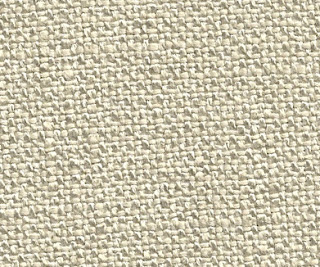
#3 - a beige option


Pretty please with sugar on top, tell me which to go with.  
  

Hold on to your pants!

Well, you know that upholstery journey I was going to be taking you on last week?  It was put on hold.  It started with a migraine.  Then, tumbled into a nasty head cold.  Then, my son began his late night puke fest.  So, needless to say, we have been taking it easy and trying to recoup.  We are hoping no one else gets sick.  With Thanksgiving only days away, it would really stink to not be able to do the ritual overeating.  I mean, I intentially wear pants with some sort of give so I can gorge myself silly.

Anyways, even in our sickness, I found something that required no work to share.  It was just about 12 years ago, when hubby and I married in December.  We moved into a rental house.  I graduated college and my mom bought us a TV.  I just had to have an entertainment center for it.  You see, we were given a lovely couch and love seat with deer and flowers on it.  I know, what more could a girl ask for, but at the time it was nice just to have a couch.  Anyways, we have lugged that beautiful Kmart 12 year old entertainment center to three different homes.  Here is what she looks like now (excuse the mess)


For those of you with a Craig's list addiction, you will understand.  I am always checking out CL.  It is that whole you never know what kind of deal you might find and all.  Any how, I ran across a armoire posted for, hold on to your pants, $25!!!  Can you believe it???!!  I told hubby that for $25 we could try it out and wouldn't be out really any money.  So, we all packed up and pulled the trailer over and picked up this baby:


It makes me feel a lot more grown up now for some reason.  It isn't a beautiful frenchy armoire that I dream of getting one day, but for $25, how could we pass it up?!  I would love to know if you think it is an improvement.  Drop me a comment and let me know.

Also, I intend to start posting about reupholstering my chair but I am currently crippled with indecision over fabric choice.  I think I might have a few other choices.  Maybe I could get you to choose for me?!

Linking to:

Tuesday, November 16, 2010

Seating for 2?

I have been dying to post about my latest Craig's list purchase.  I found these two french(?)/Victorian chairs about a month and a half ago. 


So, what do you think?  I got both for $125.  I think that was a good deal?!  As you can tell, one is a rocker.  It actually is pretty comfortable.  Anyways, the poor lady who was selling them must have thought I was nuts. When I called about the chairs, I had to ask her if they had any odor. Of course, she said no. You see, I have had a bad experience with a chair I bought from the auction. It started out okay, then I noticed the musky, old smell. I cleaned and cleaned it and made a slipcover for it. Four months later, I had to strip it down to the frame and reupholster it. That is a road I don't want to go down again for a while.

When I showed up to look at them, I apologized and explained then proceeded to stick my nose all over the chair and give big sniffs.  Thumbs up!  It was a go ahead.  As I loaded the chairs up, I think it was safe to say that the only thing to sit in the chairs was her cat.  A very long haired gray cat! 

I have decided to take you on my journey of recovering them.  I think this will help me make a daily bit of progress.  Before we embark on this journey together, you have got to help me.  I usually like the monochromatic look.  But for some reason, I have purchased this fabric for the chairs:


It is cream and brown zebra print.  Be brutally honest!  Is this too much of a jump for the chairs?  I am uncertain about my choice now that I have bought it.  As long as I don't cut it, I am still able to return it.  Please, please, let me know what you think.

Sunday, November 14, 2010

Rocket red!

Okay, I know I said I was taking 2 days off but in my defense I've been nursing the beginnings of a head cold.  I just felt pooped the past few days.  Today, however, I just couldn't let all 3 projects in the works sit around without a completion.  So, I tackled the easiest (or so I thought). 

Do you remember this free desk I posted about here?  If not, here is a reminder of what it looks like.


Well, I have been searching for a chair that would be able to fit in the tiny 16 inch opening.  My son has been using a fold up chair.  I noticed that he bumps it into the bottom of the desk because it is so wide.  I have been combing auctions, Goodwills, and Salvation Armys with my trusty tape measure.  Finally, I spotted a chair at the Salvation Army that would just fit being pushed in at the desk.  Here is the before:


I got this beauty for 6 bucks!  My only requirement for the chair is it must be less than 16" wide.  Well, this orange lovely met that.  I knew I needed to replace the foam, spray paint the base (you can't see some of the rust in the picture) and recover it.  In my head, it didn't seem that it would be that difficult.  I guess I didn't think about trying to staple through foam and marine vinyl.  After tugging, using ply-grip, and some moaning, my son has a cool rocket red chair!  It didn't turn out perfect but it should be able to withstand a 6 year old who likes to glue, paint, and use markers. 


Because I was lazy and didn't want to try to sew marine vinyl with my sewing machine, I had to use a tack strip and ply-grip on the back.  It wasn't easy.  I'm proud to say that I didn't hammer a finger when hammering with my tacks.  Anyways, it turned out okay in the back.  I was hoping it would have been more crisp but it is done and it won't bump the bottom of the desk!


I would love to know if any of you could give me tips on using ply grip (i.e. curve ease). 

I'm linkin up with:

Tatertots and Jello,

Wednesday, November 10, 2010

Oh, my head!

No, I have not abandoned my blog.  I have been experiencing technical difficulties.  Okay, a normal person probably would have had it wrapped up in an afternoon, but I'm no average Joe.  Now that my Internet access is back, I can amaze you with my latest and greatest DIY. 

Well, maybe not just yet.  You see, I wisely decided to start three projects at once.  I know not the brightest idea but so typical of me.  Unfortunately, between paint fumes and stripping down a chair, I've have lost a little gusto to keep going.  So, back to one at a time.  In the mean time, I decided to let my messes sit for a day or two.  You know my husband just loves me for doing this kind of stuff.  Now, I'm going to sit back and enjoy your blogs!!

Wednesday, November 3, 2010

Yummy yellow!

Okay, you can tell that I didn't get me project completed this past weekend.  I've finally got it to a presentable state.  Do you remember this dresser I picked up from the Goodwill?


Well, I finally rolled up my sleeves and got to work.  At first, I was paralyzed with color choices.  Do I go with my safe white or should I break out of my comfort zone??  Well, I decided to take a cue from the actual dresser itself.  It has a grain applique at the top of each side.  Why not go yellow? 

I have seen so many beautiful and bold yellows out there in blog world lately.  But for some reason, that didn't quite speak to me.  So, to Home Depot I went to look at the zillion yellow color samples.  I knew I wanted to go for more a primitive yellow perhaps.  I finally decided on, well, I would tell you but I can't find it in my stack of stuff.  After sanding the top, staining it walnut, painting and glazing, here is the yummy yellow dresser.  (edit - dug through my stack and the color is Behr Pyramid Gold UL150-13, the glaze is Valspar Mocha)


This picture really doesn't show her color off, too much sun.  Let's try this one.


Here is a close up to show the distressing and the glaze.  It's not the best but it'll have to do.


I have to wait for the glaze to cure for one week.  Then, I will poly it all.

I want to know what you think.  Please drop a comment.

I'm linking up with:
BCD  
Furniture Feature FridaysJoin  us Saturdays at tatertotsandjello.com for the weekend  wrap    up           party!

Followers

Search This Blog