Monday, December 16, 2013

Hot Chocolate Bar

There is nothing more delicious on a cold winter day than hot chocolate!  After seeing some incredibly cute hot chocolate bars others have put together, I just knew I had to put one together for a girls craft gathering I was having for some girlfriends.

I started out by taking this old game board.


I cut it down to make this sign for my hot chocolate bar backdrop.


Next, I was able to dive into my ironstone to serve some sweets!  Nothing makes me more giddy than being able to use my ironstone!  I went sweet and simple for the snack area.


Now to the hot chocolate bar!


The ladies loved it.  I wonder how long I can keep this station out?!  I just love how it came together!

Sharing at:
Keeping It Simple One on sidebar

Friday, December 13, 2013

So soft and sweaters

I don't know about you but this girl cannot pass up anything fluffy and soft.  When I was at Hancock Fabrics, I stumbled upon a super soft winter white faux fur.  $20 later, I walked out with 2 yards of fabric and an itch to get to work.

After pulling out my sofa throw pillows, I decided that they were too lumpy (probably from all of the pillow wars:).  Back out armed with coupons, I come back with two new plush pillow inserts from Joann's.  I am all about doing things nice and easy.  So, I whip up two envelope pillow covers.  I notice I have a lot of fabric left.  You know the saying, waste not, want not.  Now, I am on the hunt for random pillows floating around my house to fluffify (yeah, I know that is not a word).

2 yards of fabric, $20, and 5 pillows later, I have 5 pillows to cuddle up with on these cold winter days.


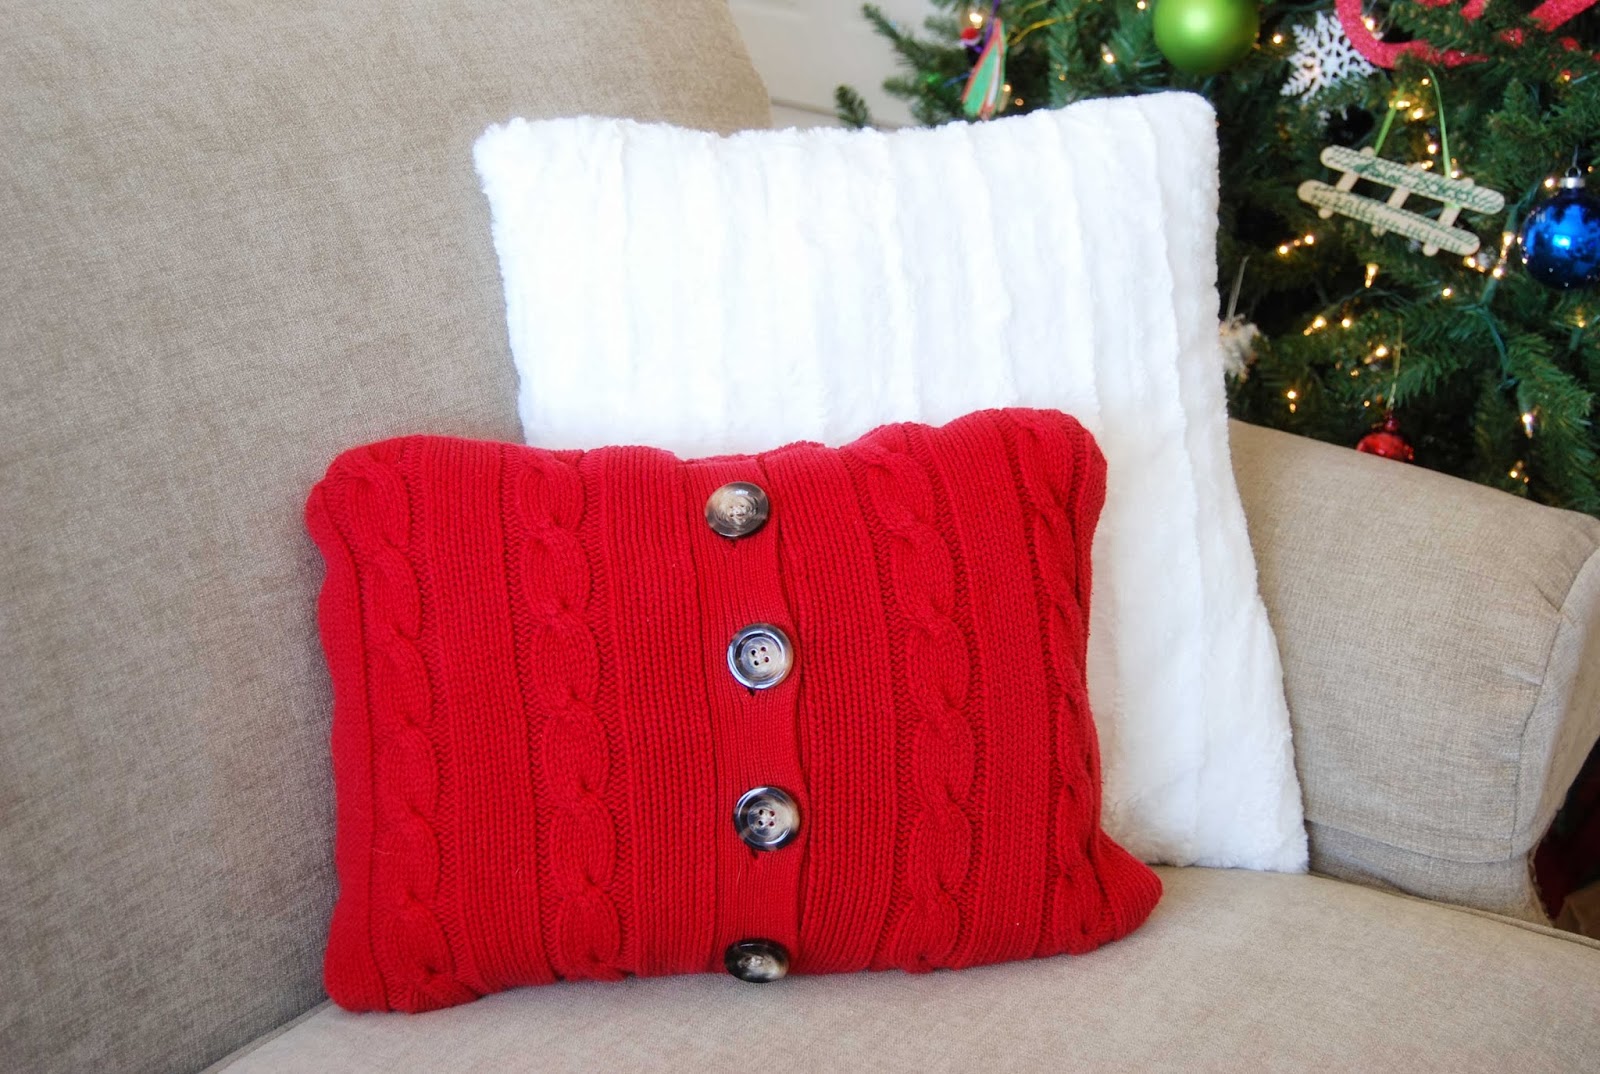
I have the softness.  Now, I need a pop of color.  Something that says Christmas and winter.  To Salvation Army I went, to find sweaters for more pillows!  I found a red and green sweater that are perfect for the splash of holiday I need to go with my oh so soft pillows.

Since I closed the green pillow with hook and loop, it stretch the sweater pillowcase out on that closure side.  My solution was to weave red ribbon through that end of the pillow to look like a present.  I love, love, love how they turned out!


Sharing at:
Frugal Friday
Show and Tell Friday
Remodelaholic


Tuesday, December 10, 2013

Christmas Countdown Advent Calendar

Who doesn't love a Christmas craft?! With all the inspiration floating out in blog land, there is no shortage of ideas. I have been checking out some advent countdown calendars. There are plenty great ones but this one I really loved from Finding Home.
Don't you agree it looks so great on that door. Unfortunately, I don't have a great, chippy door. But for the rest, oh I do. I gathered up some wired burlap ribbon, red and green ribbon, twine, scrabble tiles, and hot glue.


I followed Laura's direction's.

I really loved the charm the door added. I rummaged through the garage and found a piece of an old dresser and tied on the strings of burlap pockets.
The kids are totally loving the new advent calendar!
What do you think?
Sharing at :
Wow Us Wednesday (http://www.savvysouthernstyle.net/2013/12/wow-us-wednesdays-148.html?utm_source=feedburner&utm_medium=feed&utm_campaign=Feed%3A+SavvySouthernStyle+%28Savvy+Southern+Style%29)

Show Me What Ya Got.


Tuesday, December 3, 2013

Christmas project

Hello all!

I hope your holiday was as delightful as mine. I believe this was the second Black Friday I did not par take in. There was nothing that I felt would make me need to crawl out of bed at an absurdly early hour. So with a full night's sleep, I was energized and ready to do a Christmas project!

If you guys are anything like me, you cannot resist anything free. When a lovely lady had offered up some cabinet doors for free at a yard sale, I jumped on it. I have had three doors sitting in the garage since the summer. When pinspiration hit, I knew what to do.

After cleaning the door up, I gave it a fresh coat of red paint. Next, I made a stencil with my cricut using cardstock paper.


Once I placed on the stencil, I went to work stenciling with white paint. After going over it twice, carefully peeled off the stencil. I had to touch up a few minor places with an artist's brush and voila! A Christmas decoration for $0!


Followers

Search This Blog